Post by s54smg2 on Jun 5, 2013 23:43:36 GMT -5
e46 m3 diy

Valve Adjustment
Parts & Tools:
Optional maintenance when performing this job:
Remove the engine cover:

To remove valve cover:


To remove valve cover:

Before you begin:

Step1:


Step 2:

Step 3:

Step 4:

Step 5:
Disclaimer: Do this procedure at your own risk! This is offered for reference only. I disclaim all liability for direct, indirect, incidental, or consequential damages or injuries that result from the use of any of these examples, instructions, or other information.

Valve Adjustment
Parts & Tools:
- valve cover gasket
SHOP Valve Cover Gasket
 - 13 cap nuts (if needed)
SHOP Cap Nuts
 - 13 cap nut washers
SHOP Washers
 - 13 rubber seals
SHOP Seals
Seals - 2 cap nuts
SHOP nuts
nuts - 2 rubber seals
SHOP seals
seals - 6 profile gaskets
SHOP gaskets
 - 2 copper crush washers (banjo bolt)
SHOP washers
 - s54 shim kit
SHOP Shim Kit
 - shim tool
SHOP shim tool
 - 32mm wrench
- 3/8 socket driver
- short extension
- 10,13,17,18mm sockets
- torx 30
- micrometer
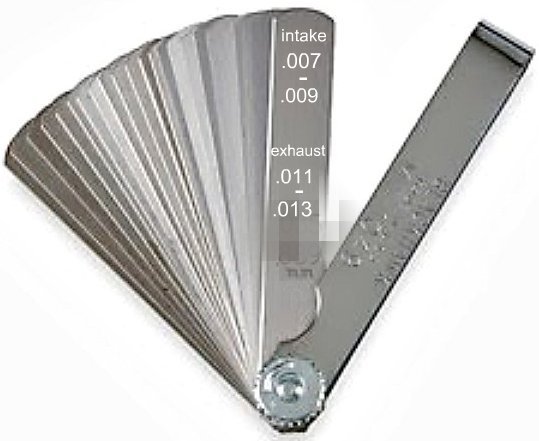
- feeler gauges -Intake valves(.007,.009) exhaust valves(.011,.013)
- razor blade
- pen and paper
- shop towels
Optional maintenance when performing this job:
- Spark Plugs & Coils (spark plug/coil DIY link)
Remove the engine cover:
- remove strut brace
- remove wire cover from cabin filter housing
- remove cabin filter
- remove cabin filter housing (see location of torx bolts below)
- remove 6 engine cover bolts
- remove oil cap
- remove vent hose

To remove valve cover:
- remove banjo bolt on the side of the valve cover. (watch for the two crush washers on either side of the bolt)
- remove ground wire bolt on side of valve cover
- unclip the O2 sensor holder with squeeze clips
- gently move rubber grommet out of the way
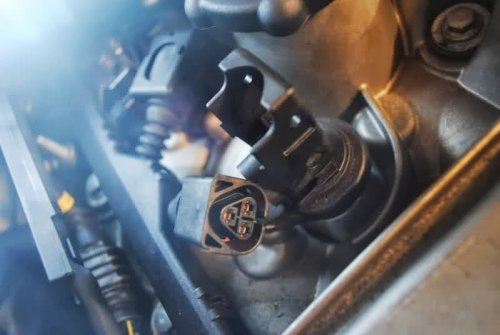
- remove coils by disconnecting clip and pulling strait up (pic below)


To remove valve cover:
- remove 15 valve cover bolts
- you can unbolt the positive battery wire if you choose to
- carefully lift. (if its stuck in any way you can put your fingers in the oil fill to help pull up)

Before you begin:
- your engine must be completely cold before you start, no exceptions
- cover any holes using your shop towels. be sure to cover the timing chain/vanos area.
- *this is a good time to check your vanos exhaust hub for broken tabs
- carefully remove the valve cover gasket, do not drop and debris into the motor.
- using a shop towel and razor blade if needed, clean the surface where the valve cover sits. clean around the spark plug cylinders for the new gaskets

- be sure to cover the holes leading directly into your crankcase
- early 2001 models did not have the safety nets

Step1:
- set cam lobe position. using your 32mm wrench on the crankshaft bolt, rotate counterclockwise until cam lobes are facing strait up
- line up the top of the cam lobes with the flat of the camshaft guide, see pic below
- when you line up one of the intake cylinders, one of the exhaust cylinders will also line up. they will not line up on the same cylinder ever


Step 2:
- once you've lined up the cam lobes you are ready to check the clearance of your existing shim
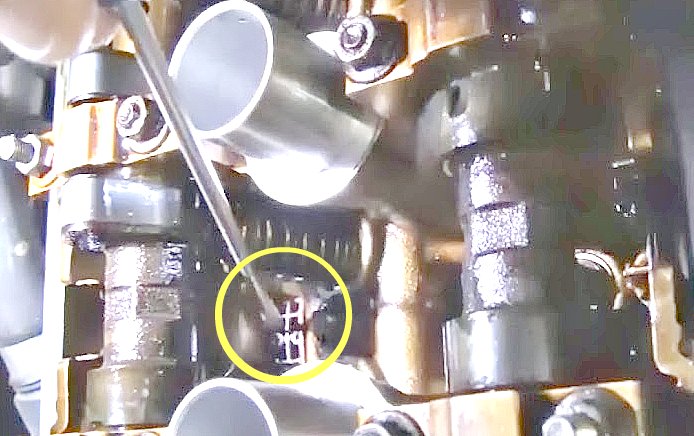
- the pic below will show you where to measure
- slide your feeler gauge down the cam lobe and it will slide between the lobe and the rocker arm where you need to measure
- on the intake side your seven thousandths feeler gauge should fit with slight drag(you will learn the feel as you go), your nine thousandths should not fit
- if your nine thousandths does fit, you will use your shim kit to find the appropriate shim needed to to make the valve clearance within spec
- after you finish the intake valves, check the exhaust valves that are lined up before you crank the motor to the next intake cylinder
- on the exhaust side, eleven thousandths feeler gauge should fit and thirteen thousandths should not
- measure and make adjustment where necessary. take your time and be organized, it will help make this job go very smooth


Step 3:
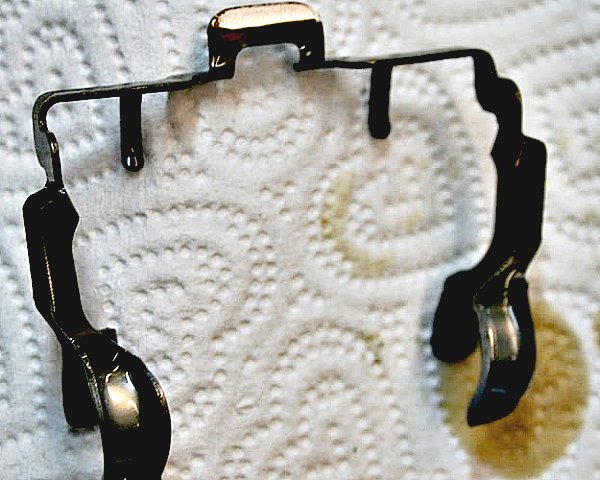
- when you find a valve out of spec the first step to remove the shim is to remove the retaining clip that holds the rocker arm in place
- just grab the clip and pull it up, it should easily pull of, if it gives you any problems just pull up from one side at a time
Step 4:
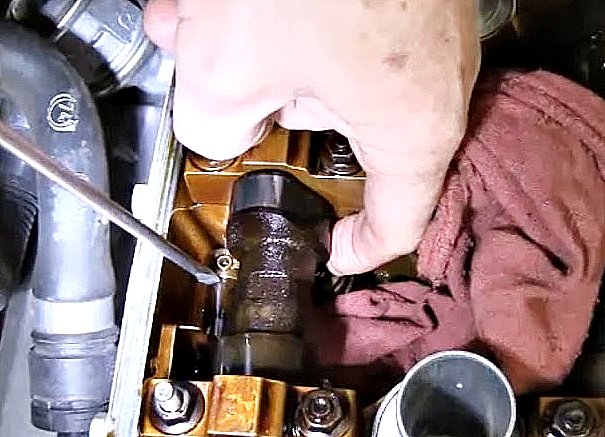
- with the retaining clip removed you are ready to slide the rocker arm out of the way
- use two hands rather than a screwdriver as seen in the pic below
- lift up with your finger in the front and while holding up slide the rocker arm with your other hand where the screwdriver is in the pic
- move it slightly out of the way and rest it down then you're ready to move on


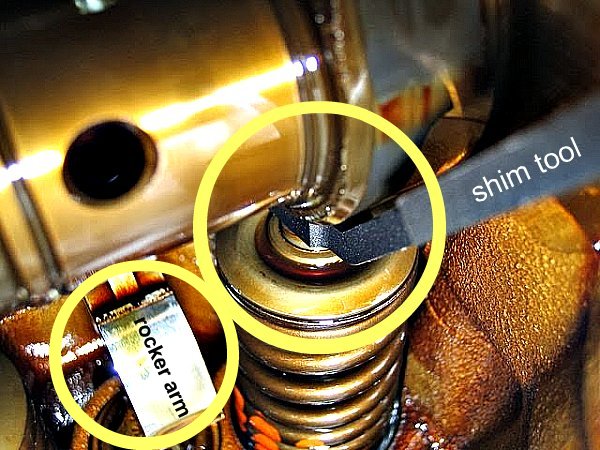
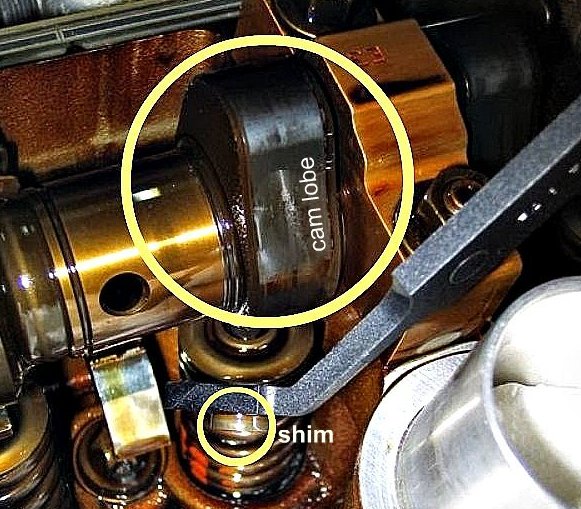
Step 5:
- using your shim tool with magnet, carefully remove your shim as seen in pic below
- when re-installing your new shim, be sure it is sitting perfect in its place. use the opposite end of the shim tool and tap the top of the shim to be sure it is set in place
- keep your shim tool clean from oil at all times make this job easier
- any oil on the shim tool will cause the shim to stick to it when trying to install. Be mindful and do not drop any shims
- after adjusting all your valves you will install your new gaskets and reassemble
- i do not use any gasket sealer when i install my valve cover gasket. (i have never leaked oil from this gasket)
Disclaimer: Do this procedure at your own risk! This is offered for reference only. I disclaim all liability for direct, indirect, incidental, or consequential damages or injuries that result from the use of any of these examples, instructions, or other information.

