Post by s54smg2 on Dec 9, 2014 11:46:41 GMT -5
e46 m3 Intake Air Temperature Sensor Relocate S54



M3Support was the first to offer the IAT relocate years ago! After MANY in the community challenged the move, it was proven in the end to be a great idea!
Parts & Tools:
Purchase Your Own IAT Kit HERE
...or build your own with these items below
- Temperature sensor:
Shop Beru#0824111004/BMW#13621725323
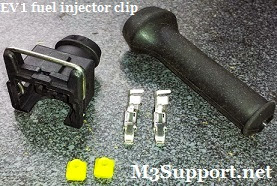
 - Bosch EV1 female fuel injector clip with boot and connectors (do not buy the pigtail version, you will need longer wire length for this project)
- 22 gauge wire 5ft total (2 1/2 feet should be plenty)
- black wire loom
- heat shrink wire connector
- wire tap
- soldering iron/solder
- vice
- flat-head screwdriver
- 3/8 socket driver
- 3/8 long extension socket
- 10mm deep socket (3/8)
- 1/2 socket driver
- 19mm socket (1/2)
- drill
- 7/16 drill bit
- wire stripper
- scissors
- electric tape
- small black zip ties
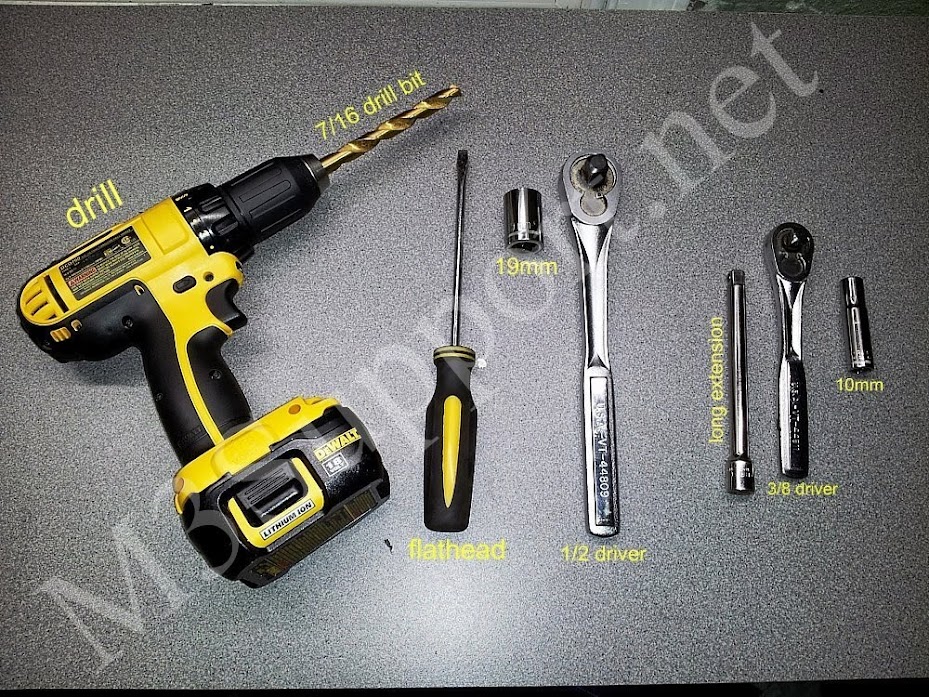
Building your Bosch EV1 Connector
- clamp your connector into your vice
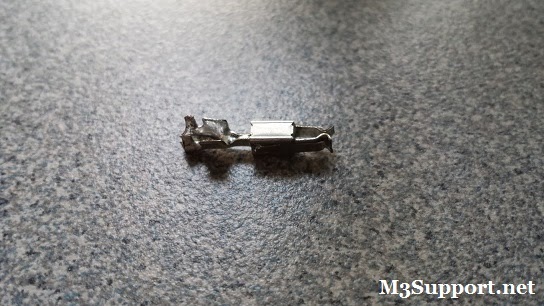

- cut your 5ft 22 gauge wire in half to giving you 2 1/2ft each.
- trim your wire to the length of the connector wire holder
- fill your wire holder with solder(do not attach wire yet)


- add flux to your wire and the connector where you filled it
- placing the wire on top of the solder press your soldering iron on top of the wire and solder, the wire will sink into the heated solder to the base of the connector
- be sure to press the rubber wire jacket to the base of the connector to ensure nothing is exposed (when inside the EV1 housing it will be safe and separated from one another)
- when done correctly it will look like the lower right picture


- install the connector into the EV1 housing with the tabs facing the outside so the connector is horizontal after installed for the air sensor tabs to insert into
- there are 2 butterfly tabs on either side of the connector. slightly bend them back before inserting as they will keep the wire and connector from backing out once installed
- you will need to slightly trim the connector tabs(different from the butterfly tabs) located at the base of the connector to fit into the EV1 housing (try not to trim too much as these tabs will help hold the connector tight in place pressing against the inner housing walls)
- once fully pressed in you will feel the connector clip into place. Repeat process to a second wire

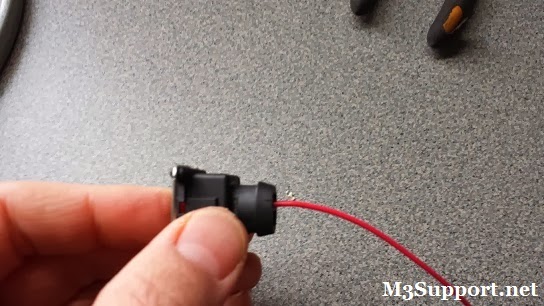
- slide the yellow stoppers into place
- slide the boot into place
- add your wire loom for the oem look and your connector is ready to be installed
- dont feel like building your own kit? Tuning Tech FS has what you need.


Installing the IAT Relocate
- remove MAF sensor wire clip by squeezing clips and pulling back

- loosen the screw on the intake elbow
- un-clip the airbox on the right
- remove intake top
- remove air filter

- to the right of the airbox is a plastic cover with 2 wires
- pull off the plastic cap by pulling up
- remove the two 10mm bolts using your 3/8 driver with long extension
- you can now remove your lower airbox from the car

- select a place to mount the sensor. you can see in pics below how I chose to mount the sensor in the direct airflow to the intake box. With my set up running ram air from the csl bumper to my airbox, this was an ideal placement for me to read true ambient temps.
- Dinan's intake mounts theirs in the brake duct
- The goal here is to measure ambient temperature in a place that will not become heat soaked
- using your drill, first make a starter hole with a smaller drill bit, than use your 7/16 bit to finish the hole

- using your 1/2 19mm socket, start threading the sensor into your airbox
- as soon as its tight by hand, use your 1/2 driver to finish threading it in
- if you stop tightening when it threads completely in, it should be tight enough to sit on its own that way
- add the mounting bolt or fastener if needed
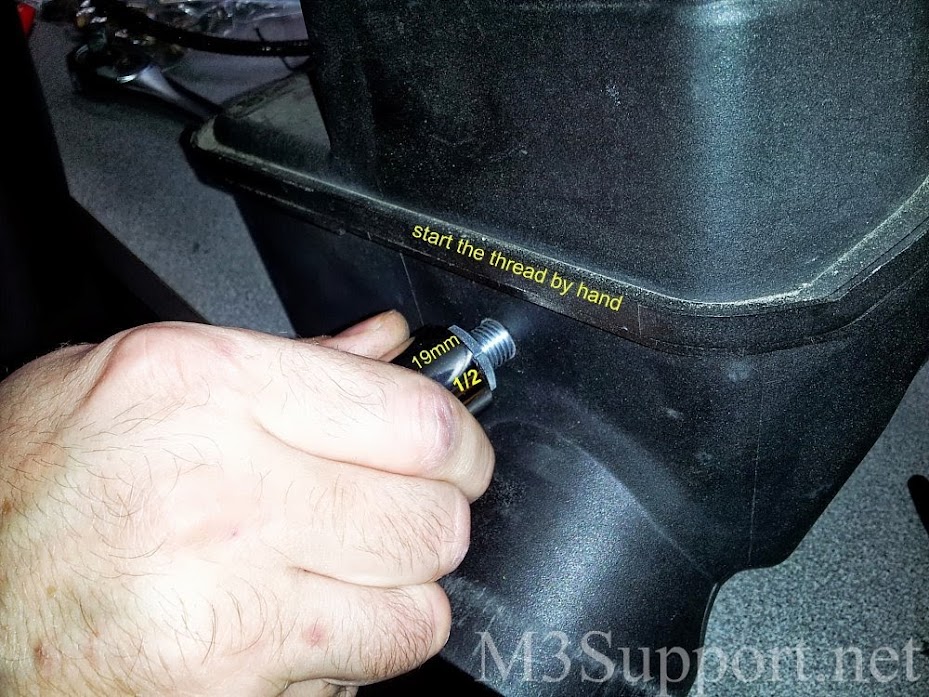
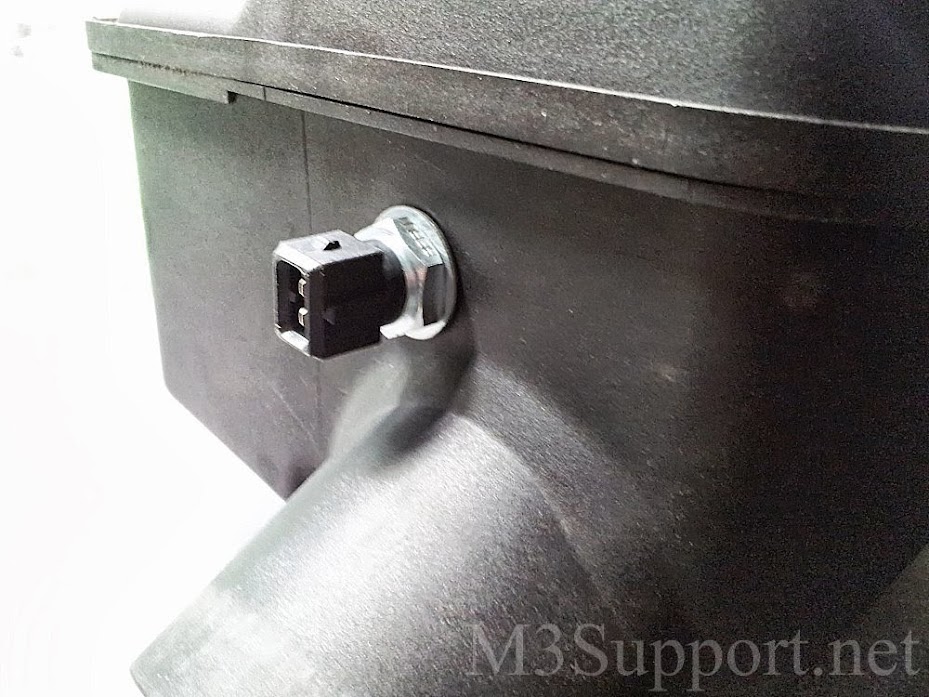


- When drilled properly the thread should be tight enough to use just the fastener rather than the mounting bolt
- The mounting bolt works great but is just another variable to warm and slightly heat soak the sensor.
-the bolt is surprisingly hot to the touch after driving
-fastening clip cannot be removed once installed without cutting. (it is easy to remove if needed, just cannot be reused)

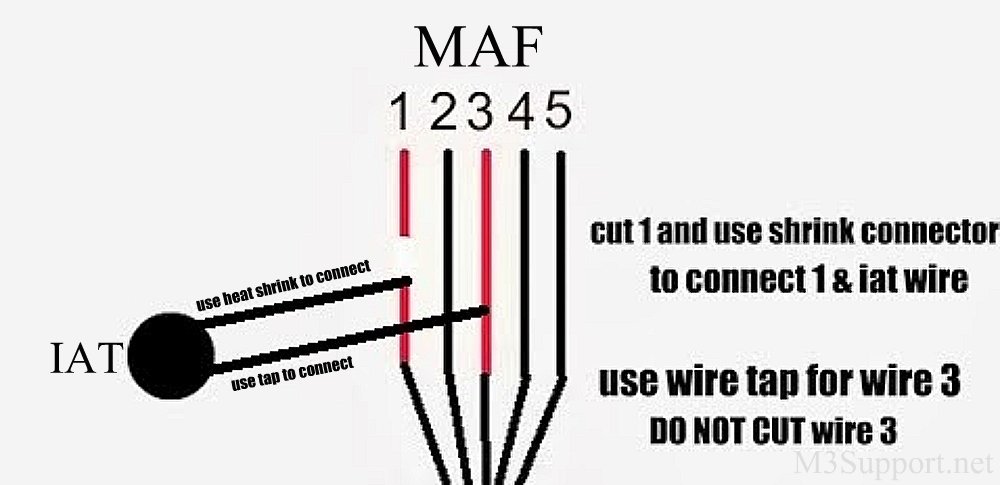
- wiring this sensor into the MAF is simple but it's EXTREMELY important that it is done correctly!
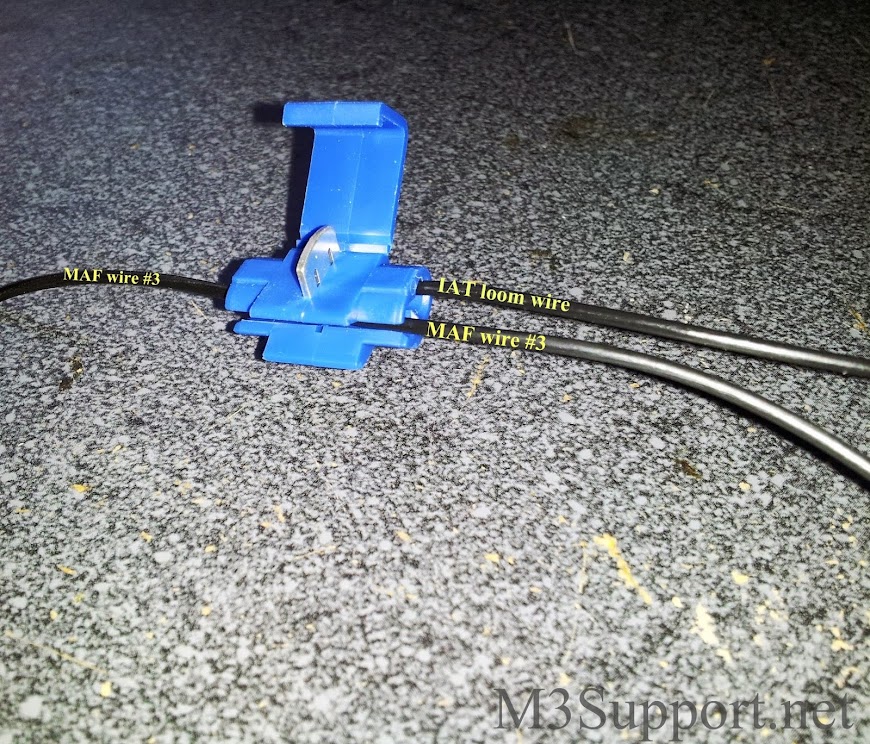
- It does not matter which loom wire is hooked up to number(s) 1 or 3, it functions proper either way as long are both are connected as shown in the picture above.
- TESTING after installed is strongly suggested and for this reason: if a connection is not done correctly, your car will fluctuate back and forth between 140F and -40F, confused not know what to do and worse yet, adjusting your timing to compensate for the extreme temperatures its now reading. . . no check engine light will show when this happens initially.
*to test the IAT sensor is functioning properly I use the Torque App with a wireless obd2 reader. This will show me intake air temperatures as they are and will indicate that the sensor is functioning properly.
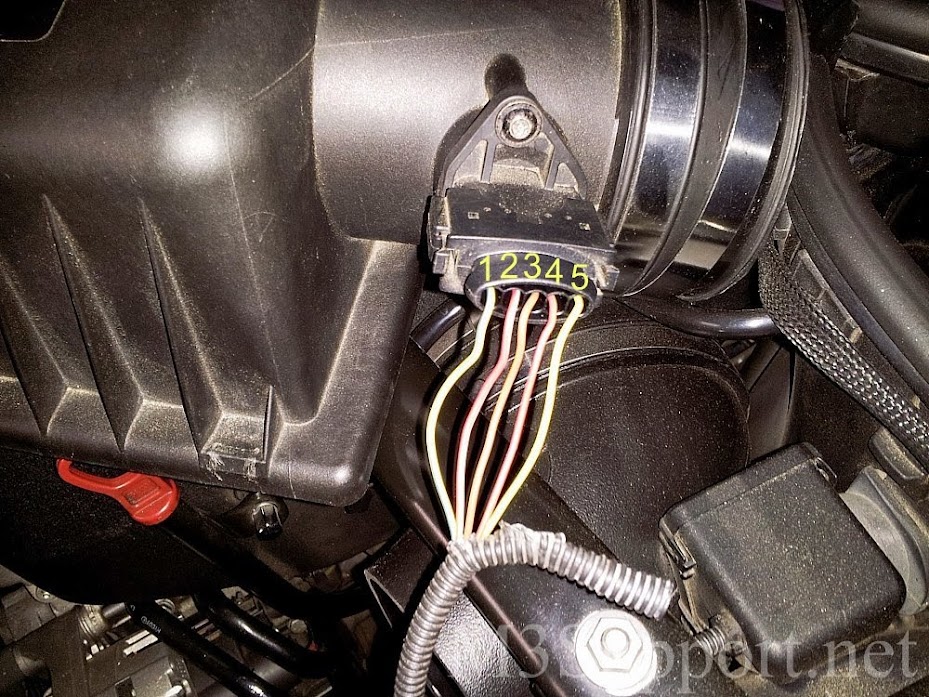
- using your scissors carefully trim back the oem plastic loom
- give yourself enough room when cutting wire 1 to convert back to oem if you ever choose to

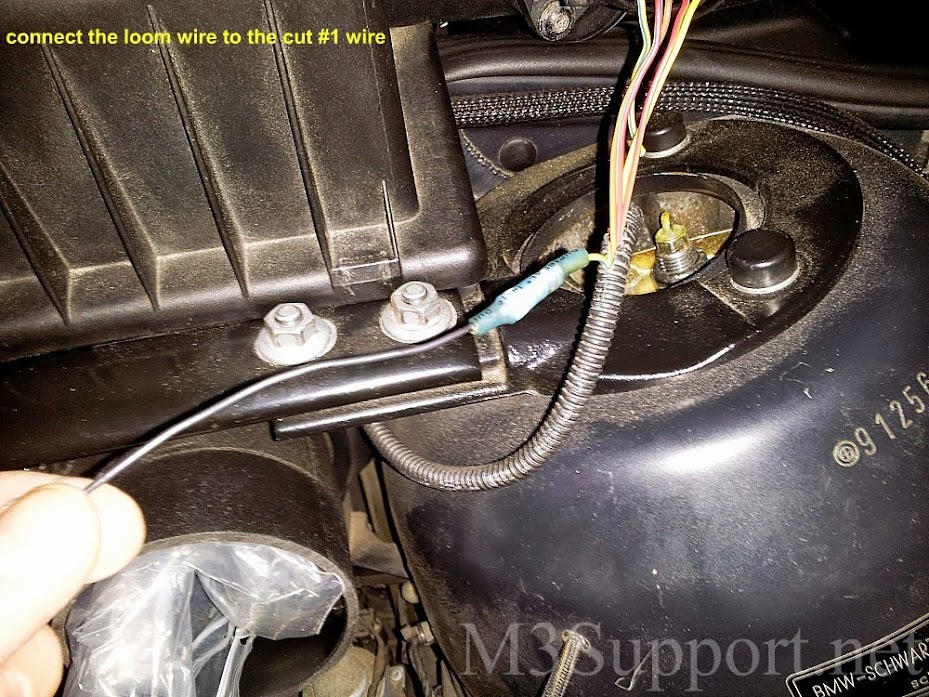
- The best connection would be to twist the #1 wire and loom wire and solder them together
- If you don't have the tools to solder, use the supplies we sent in the kit and follow the direction below

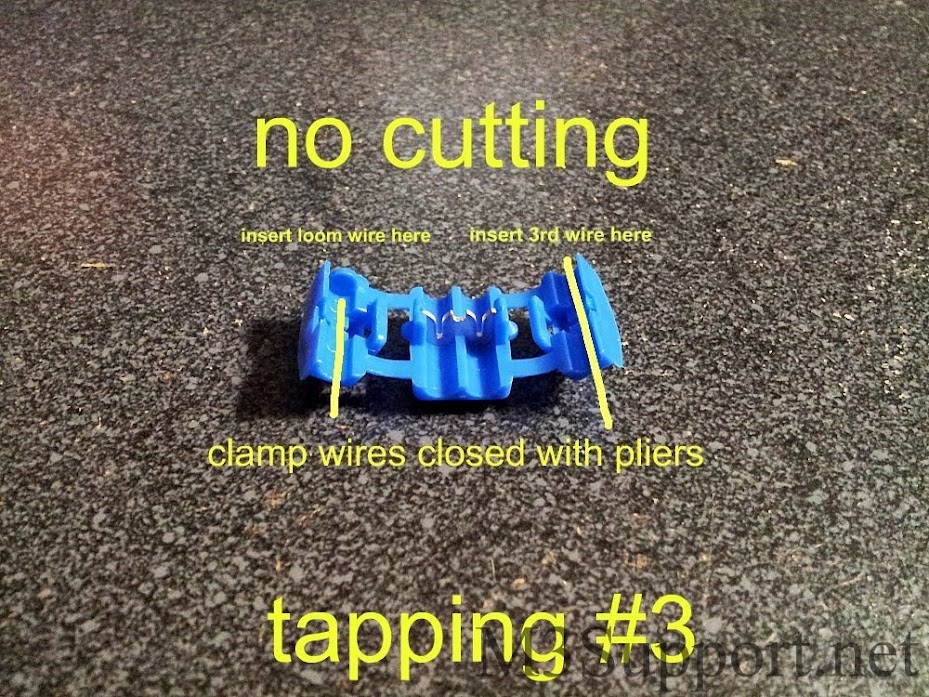
- another style of splice connector

Disclaimer: Do this procedure at your own risk! This is offered for reference only. I disclaim all liability for direct, indirect, incidental, or consequential damages or injuries that result from the use of any of these examples, instructions, or other information.

